


Please excuse my stupid face 8)
Hey Ladies! If you follow me on Twitter you will know that I tweeted today asking you all which post you would like from me next and gave three options. The winner was my Messy Bun post so here it is. To be honest, I never really intended to do this post but when I took these pictures at the weekend, I figured some of you might like to know how I achieved this look so I took it upon myself to take some step by step pictures and do a tutorial.
Messy Buns are a beauty and fashion blogger fave when it comes to hair styles and I am no exception. I love how they are quick, easy and stylish. This type of hairstyle can be worn for almost any occassion - work, a shopping trip, dinner with friends; you name it!
I went to a family party on Sunday and as I was having a bit of a bad hair day, I decided to sling it up and see what happened.
Normally I use a hair donut to create this look but as I didn't have one to hand, I had to make do with a hair band and bobbi pins. A lot of this hair style is down to trial and error as each time I do it, it looks slightly different from the time before. It took me about five minutes from start to finish to create and I am going to try and explain how I did it below without confusing you too much.
Step 1:
The first thing I do is brush my hair through with my tangle teezer. I find it easier to work with if it is freshly brushed so I brush it all back from my face until it is smooth and tangle free.
Step 2:
Next I scoop all of my hair up to the height I want the bun to be and tie it with a hair band. I usually place it on the crown of my head as I find this suits me best. However, if you prefer a higher or lower bun, the same steps apply just tie your hair higher or lower.
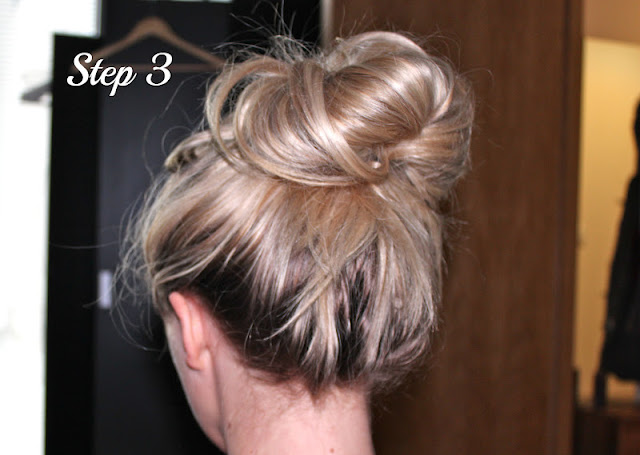
Step 3:
When tying my hair up I leave it in a loop instead of pulling all of the hair through as this gives the basic shape for the bun to form around.
Step 4:
I then take a handful of bobbi pins and pull the hair around in until it forms a shape I am happy with. This section is completely trial and error as you can wrap bits of hair around, pin bits under or just pop the bobbi bins in around the base of the hair tie until you create a shape that you are happy with. When I do mine, it doesn't always necessarily look like a bun, more like a messy up-do but I prefer that look to a structured, neat bun.
After these four steps, I then pull bits of hair out around the front and sides to make it appear more messy and then spritz it with hairspray. Wallah - Messy bun complete.


As you can see from the above pictures, this is a simple hairstyle that takes no time at all. If I can do this, anyone can as I am a complete hair novice. If you do give it a go, please do let me know how you get on. Happy messy bun creating!
P.S - Please excuse my awful roots. I'm a bit fussy about who does my hair so while I was in Australia I only had it done once. It's done my hair the world of good but I need to get some bleach on it ASAP - It may as well be Ombre. Yikes.
Do you like messy buns? How do you do yours?
Lots of Love,


No comments:
Post a Comment